


How and why to customize your radial menu in Monster Hunter Wilds
The radial menu in Monster Hunter Wilds is your one-stop for quick access to essential items during hunts. Customizing it ensures you're never at want for heals, buffs, or any other consumable benefit. The question, then, is how to customize it and why it's so important that you do. How to customize your radial menu in Monster Hunter Wilds Screenshot by Destructoid You can customize your radial menu whenever you enter a tent at a Base Camp or pop-up camp out in the wild. By default, you have four pre-built menus, including a new one that automatically chooses which healing or cleansing item you should use. When you enter a tent, the fourth option in the Item Menu is the Customize Radial Menu option. You can swap between a keyboard and mouse view or a controller view by either pressing the right stick or pressing Left Ctrl. Once in the customization menu, you can alter the four pre-built menus and create up to four additional radial menu setups. To change a particular node on the menu, select it to move your cursor onto the right-hand menu. We'll call this the "selection menu," and it allows you to bind the following items or actions to a particular radial menu node: Screenshot by Destructoid Consumable items like healing items, buffs like Demondrugs, Slinger ammo like Flash Pods, etc. Different ammo and coatings for Bowguns and Bows Essential items you have an infinite supply of, like Throwing Knives, the BBQ Grill, Camping Kit, etc. Craftable items in the field, like making Mega Potions, Barrel Bombs, Demon Drugs, traps, ammo, etc. Various communication methods like emotes and preset chat lines like "Nice to meet you!" and "Sorry...," as well as Gestures and Poses. Miscellaneous binds like the SOS Flare, calling your Seikret, Optimal Health Recovery, Photo Mode, etc. To change a current bind on your radial menu, like Optimal Health Revory, highlight it in the menu in yellow. Use your main interact button to select it and go through the different bind options listed above. You can have up to 12 binds per unique radial menu, and you can add binds by selecting the line between them and registering your choice. The game will automatically add it to the menu. You can then rearrange the menu to your liking. How to make a good radial menu in Monster Hunter Wilds Screenshot by Destructoid The best radial menu setups are designed to keep you conscious and hunting for as long as possible. That means you can access heals, status cleanses, and so on whenever needed. The Optimal Health Recovery option does a good job of getting Mega Potions down your gullet, but you can do so much more. With the right radial menu and in-hunt inventory setup, you can effectively have up to twenty Mega Potions on tap, up to seven Max Potions, and whatever else you want. To start, I always recommend having your best heals on the top radial menu. That means Mega Potions, Max Potions, Ancient Potions, Life Powders, Nulberries, Antidotes, and Energy Drinks. You'll only realistically need to add the Max and Ancient POtions and Life Powders, as the Optimal Healing and Status option can cover the rest. Next, prioritize your bottom radial loadout. I've always used mine as a portable crafting station. Mega Potions on the left, Max Potions on the right, First-Aid Med + crafting above or below Mega Potions, plus whatever else you know you burn through during a long hunt. I also put other actually essential items on my bottom radial menu. My favorites are Mantles, Farcasters, and Sharpening. Screenshot by Destructoid I'd recommend using the left and right menus for specific weapon requirements. Leaving the left-hand menu as your way to equip specific ammo is fine, and you can alter the right-hand one for crafting that ammo. Remember that you can save up to 36 unique radial menu loadouts, so if you want something specific for Gunlance that's different from Bow or Switch Axe, you have that option. The remaining corner menus can act as overflow for whatever you want quick access to. Having a spot for easy communication is nice if you plan to do any online co-op, especially with random teammates and especially during SOS flare co-op. Note that if you want to craft something during a hunt, you need to have enough of the right materials in your inventory. Mega Potions, for instance, require you to have at least one regular Potion and a unit of Honey for every craft. If you choose to craft all the items at once while customizing your radial menu, you'll expend as many of the crafting materials as you have available. In summary, then, a starting custom radial menu could look like this: Top selection: Immediate need, including healing, status cleansing, and team-wide buffs. Bottom selection: Crafting additional healing, supplementary hunting, and survival tools Left and right selections: Ammo and other weapon-specific crafts and equip slots Corner selections: Communication and overflow slots for any
The radial menu in Monster Hunter Wilds is your one-stop for quick access to essential items during hunts. Customizing it ensures you're never at want for heals, buffs, or any other consumable benefit. The question, then, is how to customize it and why it's so important that you do.
How to customize your radial menu in Monster Hunter Wilds
You can customize your radial menu whenever you enter a tent at a Base Camp or pop-up camp out in the wild. By default, you have four pre-built menus, including a new one that automatically chooses which healing or cleansing item you should use.
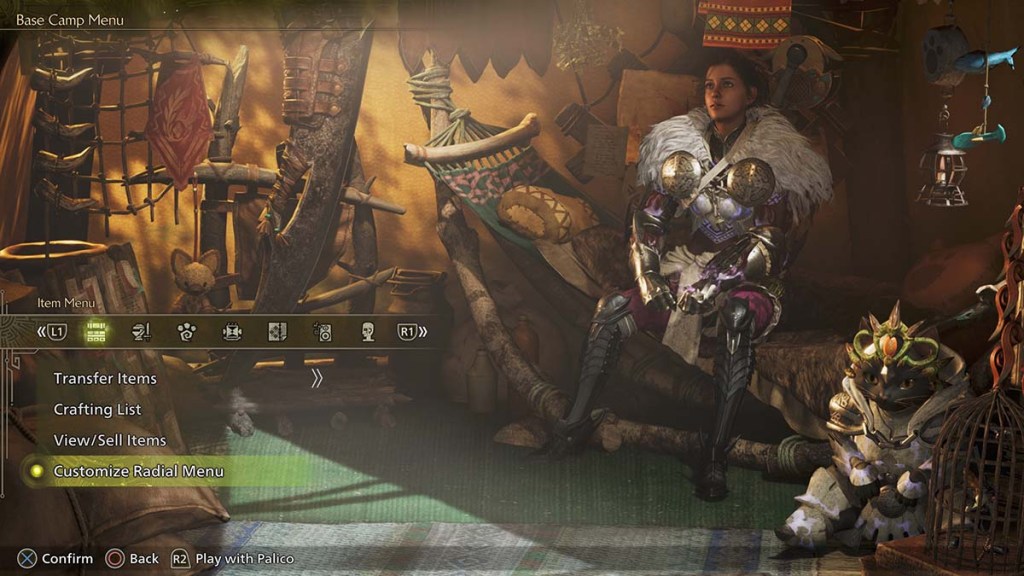
When you enter a tent, the fourth option in the Item Menu is the Customize Radial Menu option. You can swap between a keyboard and mouse view or a controller view by either pressing the right stick or pressing Left Ctrl.
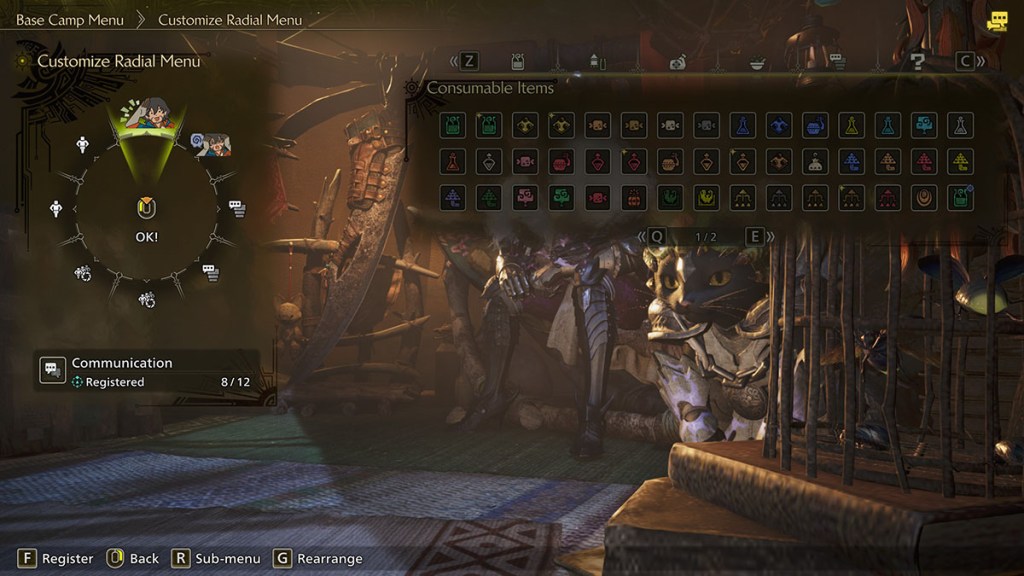
Once in the customization menu, you can alter the four pre-built menus and create up to four additional radial menu setups. To change a particular node on the menu, select it to move your cursor onto the right-hand menu. We'll call this the "selection menu," and it allows you to bind the following items or actions to a particular radial menu node:
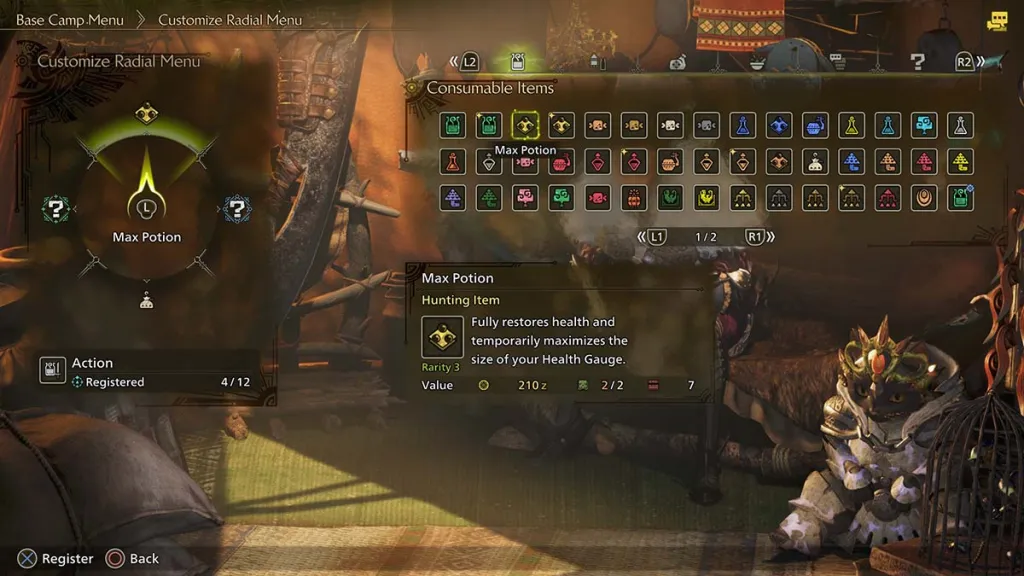
- Consumable items like healing items, buffs like Demondrugs, Slinger ammo like Flash Pods, etc.
- Different ammo and coatings for Bowguns and Bows
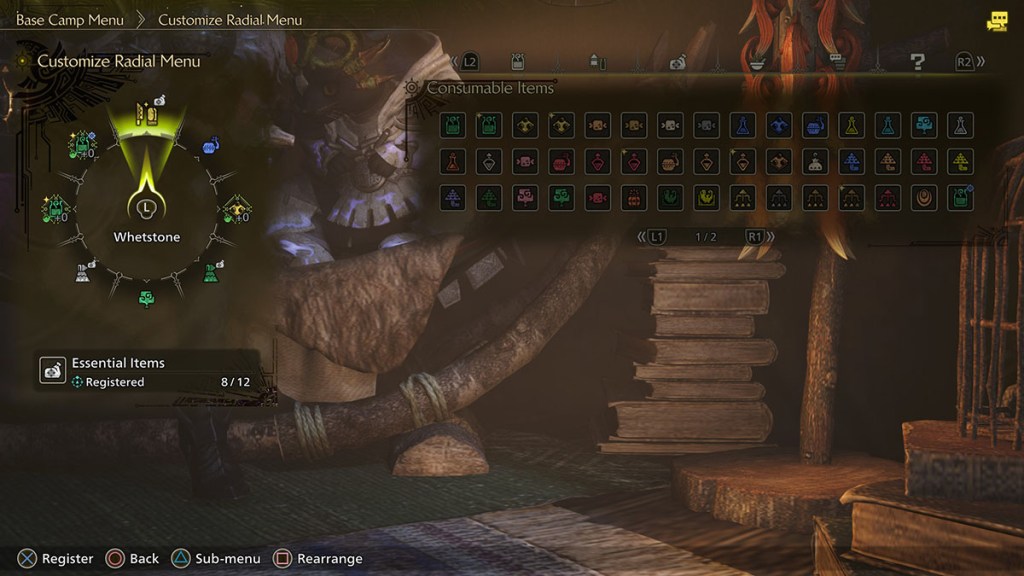
- Essential items you have an infinite supply of, like Throwing Knives, the BBQ Grill, Camping Kit, etc.
- Craftable items in the field, like making Mega Potions, Barrel Bombs, Demon Drugs, traps, ammo, etc.
- Various communication methods like emotes and preset chat lines like "Nice to meet you!" and "Sorry...," as well as Gestures and Poses.
- Miscellaneous binds like the SOS Flare, calling your Seikret, Optimal Health Recovery, Photo Mode, etc.
To change a current bind on your radial menu, like Optimal Health Revory, highlight it in the menu in yellow. Use your main interact button to select it and go through the different bind options listed above. You can have up to 12 binds per unique radial menu, and you can add binds by selecting the line between them and registering your choice. The game will automatically add it to the menu. You can then rearrange the menu to your liking.
How to make a good radial menu in Monster Hunter Wilds
The best radial menu setups are designed to keep you conscious and hunting for as long as possible. That means you can access heals, status cleanses, and so on whenever needed. The Optimal Health Recovery option does a good job of getting Mega Potions down your gullet, but you can do so much more. With the right radial menu and in-hunt inventory setup, you can effectively have up to twenty Mega Potions on tap, up to seven Max Potions, and whatever else you want.
To start, I always recommend having your best heals on the top radial menu. That means Mega Potions, Max Potions, Ancient Potions, Life Powders, Nulberries, Antidotes, and Energy Drinks. You'll only realistically need to add the Max and Ancient POtions and Life Powders, as the Optimal Healing and Status option can cover the rest.
Next, prioritize your bottom radial loadout. I've always used mine as a portable crafting station. Mega Potions on the left, Max Potions on the right, First-Aid Med + crafting above or below Mega Potions, plus whatever else you know you burn through during a long hunt. I also put other actually essential items on my bottom radial menu. My favorites are Mantles, Farcasters, and Sharpening.
I'd recommend using the left and right menus for specific weapon requirements. Leaving the left-hand menu as your way to equip specific ammo is fine, and you can alter the right-hand one for crafting that ammo. Remember that you can save up to 36 unique radial menu loadouts, so if you want something specific for Gunlance that's different from Bow or Switch Axe, you have that option.
The remaining corner menus can act as overflow for whatever you want quick access to. Having a spot for easy communication is nice if you plan to do any online co-op, especially with random teammates and especially during SOS flare co-op.
Note that if you want to craft something during a hunt, you need to have enough of the right materials in your inventory. Mega Potions, for instance, require you to have at least one regular Potion and a unit of Honey for every craft. If you choose to craft all the items at once while customizing your radial menu, you'll expend as many of the crafting materials as you have available.
In summary, then, a starting custom radial menu could look like this:
- Top selection: Immediate need, including healing, status cleansing, and team-wide buffs.
- Bottom selection: Crafting additional healing, supplementary hunting, and survival tools
- Left and right selections: Ammo and other weapon-specific crafts and equip slots
- Corner selections: Communication and overflow slots for anything else you might need access to
Why you should create custom radial menus in Monster Hunter Wilds

The main reason for creating at least one custom radial setup is in-hunt efficiency. Having to cycle through items individually using the hotbar on the bottom right of the screen is time consuming and takes your eyes off the action. It can and will get you carted back to camp.
Additionally, once you build up muscle memory by using a custom radial menu, you can heal, cleanse, or do whatever else almost without thinking about it. You can also do so more easily while on the move, letting you keep an eye on your target monster and/or your co-op partners.
One word of advice: don't overload all your radial menus with twelve selections unless you're confident in your selection accuracy. Choosing to craft an Antidote when you really needed a Max potion is a mistake you'll kick yourself over.
However, don't be afraid to mess up a few times as you get used to your new setups. Whatever muscle memory you built beforehand will take a bit to unlearn. You could try going into lower-difficulty hunts to familiarize yourself with it, and coupling that with trying to learn a new weapon isn't a bad idea either.
Those are the main reasons I'd recommend creating a custom radial menu loadout in Monster Hunter Wilds. They're a massive improvement to moment-to-moment gameplay flow, and so long as you master them, they can save you some significant headaches.
The post How and why to customize your radial menu in Monster Hunter Wilds appeared first on Destructoid.

