


-Baldur’s-Gate-3-The-Final-Patch---An-Animated-Short-00-03-43.png?width=1920&height=1920&fit=bounds&quality=70&format=jpg&auto=webp#)


Refrigerator Dill Pickles
Make crisp, flavorful dill pickles at home without any canning equipment! These quick refrigerator dill pickles come together in just…
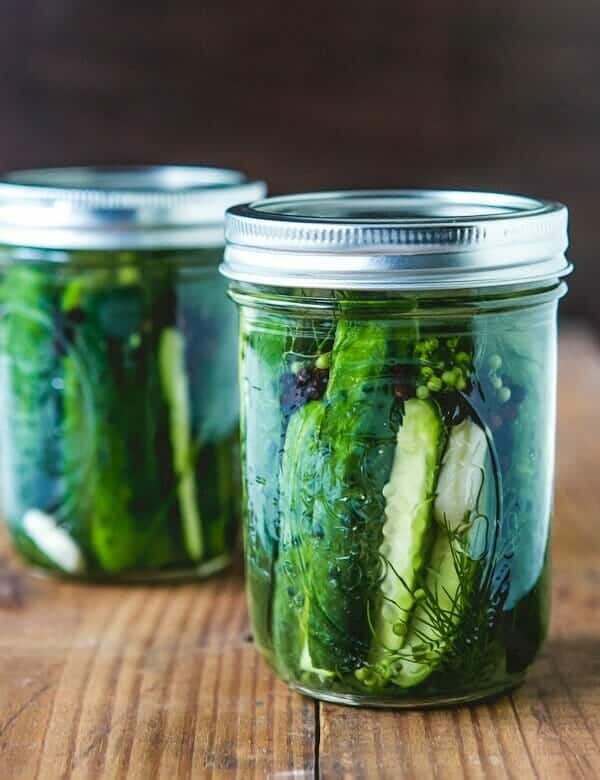
Make crisp, flavorful dill pickles at home without any canning equipment! These quick refrigerator dill pickles come together in just 10 minutes of prep time and are perfect for snacking, sandwiches, and more. Unlike traditional canned pickles, there’s no sterilizing or special equipment needed.
What’s better that a homemade jar of refrigerator dill pickles? (Answer: nothing!) Alex and I are all about mastering the art of quick pickles—they can be made in minutes and stored in the refrigerator.
We don’t have the time or energy for canning equipment and sterilizing—plus, we’d rather make a quick batch for easy snacking! You can pickle just about any vegetable, but there’s really nothing like the classic dill pickle. Here’s why this recipe works:
- Quick 10-minute prep time
- No canning equipment needed
- Cucumbers stay crisp and crunchy
- Perfectly balanced flavor
- Ready to eat in 24 hours
What’s great about refrigerator pickles
This recipe is the place to start if you’re new to canning or have never made pickles. Refrigerator pickles are vegetables that are pickled in a vinegar solution and simply refrigerated for 1 hour. They last for 1 month in the refrigerator, instead of a year or more on the shelf like traditional canned pickles.
You don’t need any fancy canning equipment or sterilization. Not only is it simple, but you’ll also be surprised at the delicious flavor after relatively little effort!
Key ingredients for success
For this refrigerator dill pickle recipe, you’ll need only a handful of ingredients. Here’s what you’ll need:
- Baby or mini cucumbers: The cucumbers you’ll need for dill pickles are the small or baby variety, something labeled pickling cucumbers. Avoid standard cucumbers here.
- Fresh dill brings in an authentic pickle flavor
- Garlic brings savory depth
- Coriander seeds and peppercorns add complexity
- Dill seed is optional, but it adds even more standard pickle flavor
- White vinegar, sugar and salt form the pickling brine
Note: Dill seeds are small, brown flat seeds of the dill plant that are used in canning. The seeds infuse a very strong dill flavor into preserved foods, but they’re not often used in cooking. Avoid using dried dill weed, which is the dried leaves and stems of the plant.

Pro tips for refrigerator pickles
For the step-by-step instructions for making refrigerator pickles, scroll down to the recipe below. Here are a few pro tips:
- Clean and prep the jars before canning. This is important to prevent bacteria growth.
- Use only small pickling cucumbers for best results.
- Cut cucumbers into consistent sizes for even pickling.
- Pack the jars tightly – they’ll shrink slightly when pickled.
- Make sure all vegetables are fully submerged in brine.
- Let pickles rest 24 hours before tasting.
- Keep refrigerated for up to 1 month for maximum freshness.
Ways to eat refrigerator dill pickles
The ways to enjoy these refrigerator pickles are endless! Here are a few of our favorite ways to eat homemade dill pickles (besides straight from the jar, that is):
- Classic sandwich topping or garnish
- Bloody Mary garnish
- Chopped in potato salad or pasta salad
- On burgers and hot dogs
- Straight from the jar for snacking
- Mixed into tuna salad, egg salad, or chicken salad
Dietary notes
This refrigerator dill pickles recipe is vegan, vegetarian, plant-based, and gluten-free.
Refrigerator Dill Pickles

Make crisp, flavorful dill pickles at home without any canning equipment! These quick refrigerator dill pickles come together in just 10 minutes of prep time and are perfect for snacking, sandwiches, and more. Unlike traditional canned pickles, there’s no sterilizing or special equipment needed.
- Prep Time: 24 hours 10 minutes
- Cook Time: 0 minutes
- Total Time: 24 hours 10 minutes
- Yield: 2 jars
- Category: Snack
- Method: Pickled
- Cuisine: American
Ingredients
- 2 1-pint wide-mouth mason jars with lids
- 1 pound small cucumbers
- 3 cloves garlic
- 4 small chili peppers (optional)
- 1 tablespoon coriander seeds
- 1 tablespoon whole peppercorns
- 1 tablespoon sugar
- 1 ½ tablespoons kosher salt
- 2/3 cup white vinegar
- 1 cup water
- 1 large handful fresh dill
- 1 to 2 teaspoons dill seeds* (optional)
Instructions
- Wash two mason jars and lids in hot soapy water, rinse, and let air dry.
- Quarter the cucumbers into four slices each, lengthwise. Cut the garlic cloves in half. If desired, slice the chili peppers in half and add to the jars.
- In a spare mason jar or covered container, combine the coriander seeds, whole peppercorns, sugar, kosher salt and white vinegar. Tightly close the lid and shake vigorously until the sugar and salt dissolve. Add the water to the mixture.
- In the two clean mason jars, tightly pack the cucumbers, garlic, fresh dill, and chili peppers (if using).
- Pour the brine mixture over the cucumbers. Tap the jars on the counter to release any air bubbles and top off the jar with extra water if any cucumbers are exposed.
- Place the lids on the jars and screw on the rings until they are tight. Leave the jars in the fridge for 24 hours before tasting. The pickles last up to one month refrigerated.
Notes
*Dill seeds are small, brown flat seeds of the dill plant that are used in canning. The seeds infuse a very strong dill flavor into preserved foods, but they’re not often used in cooking. Avoid using dried dill weed, which is the dried leaves and stems of the plant.
More pickles recipes
If you’re into pickling and canning, here are more recipes you might enjoy: