


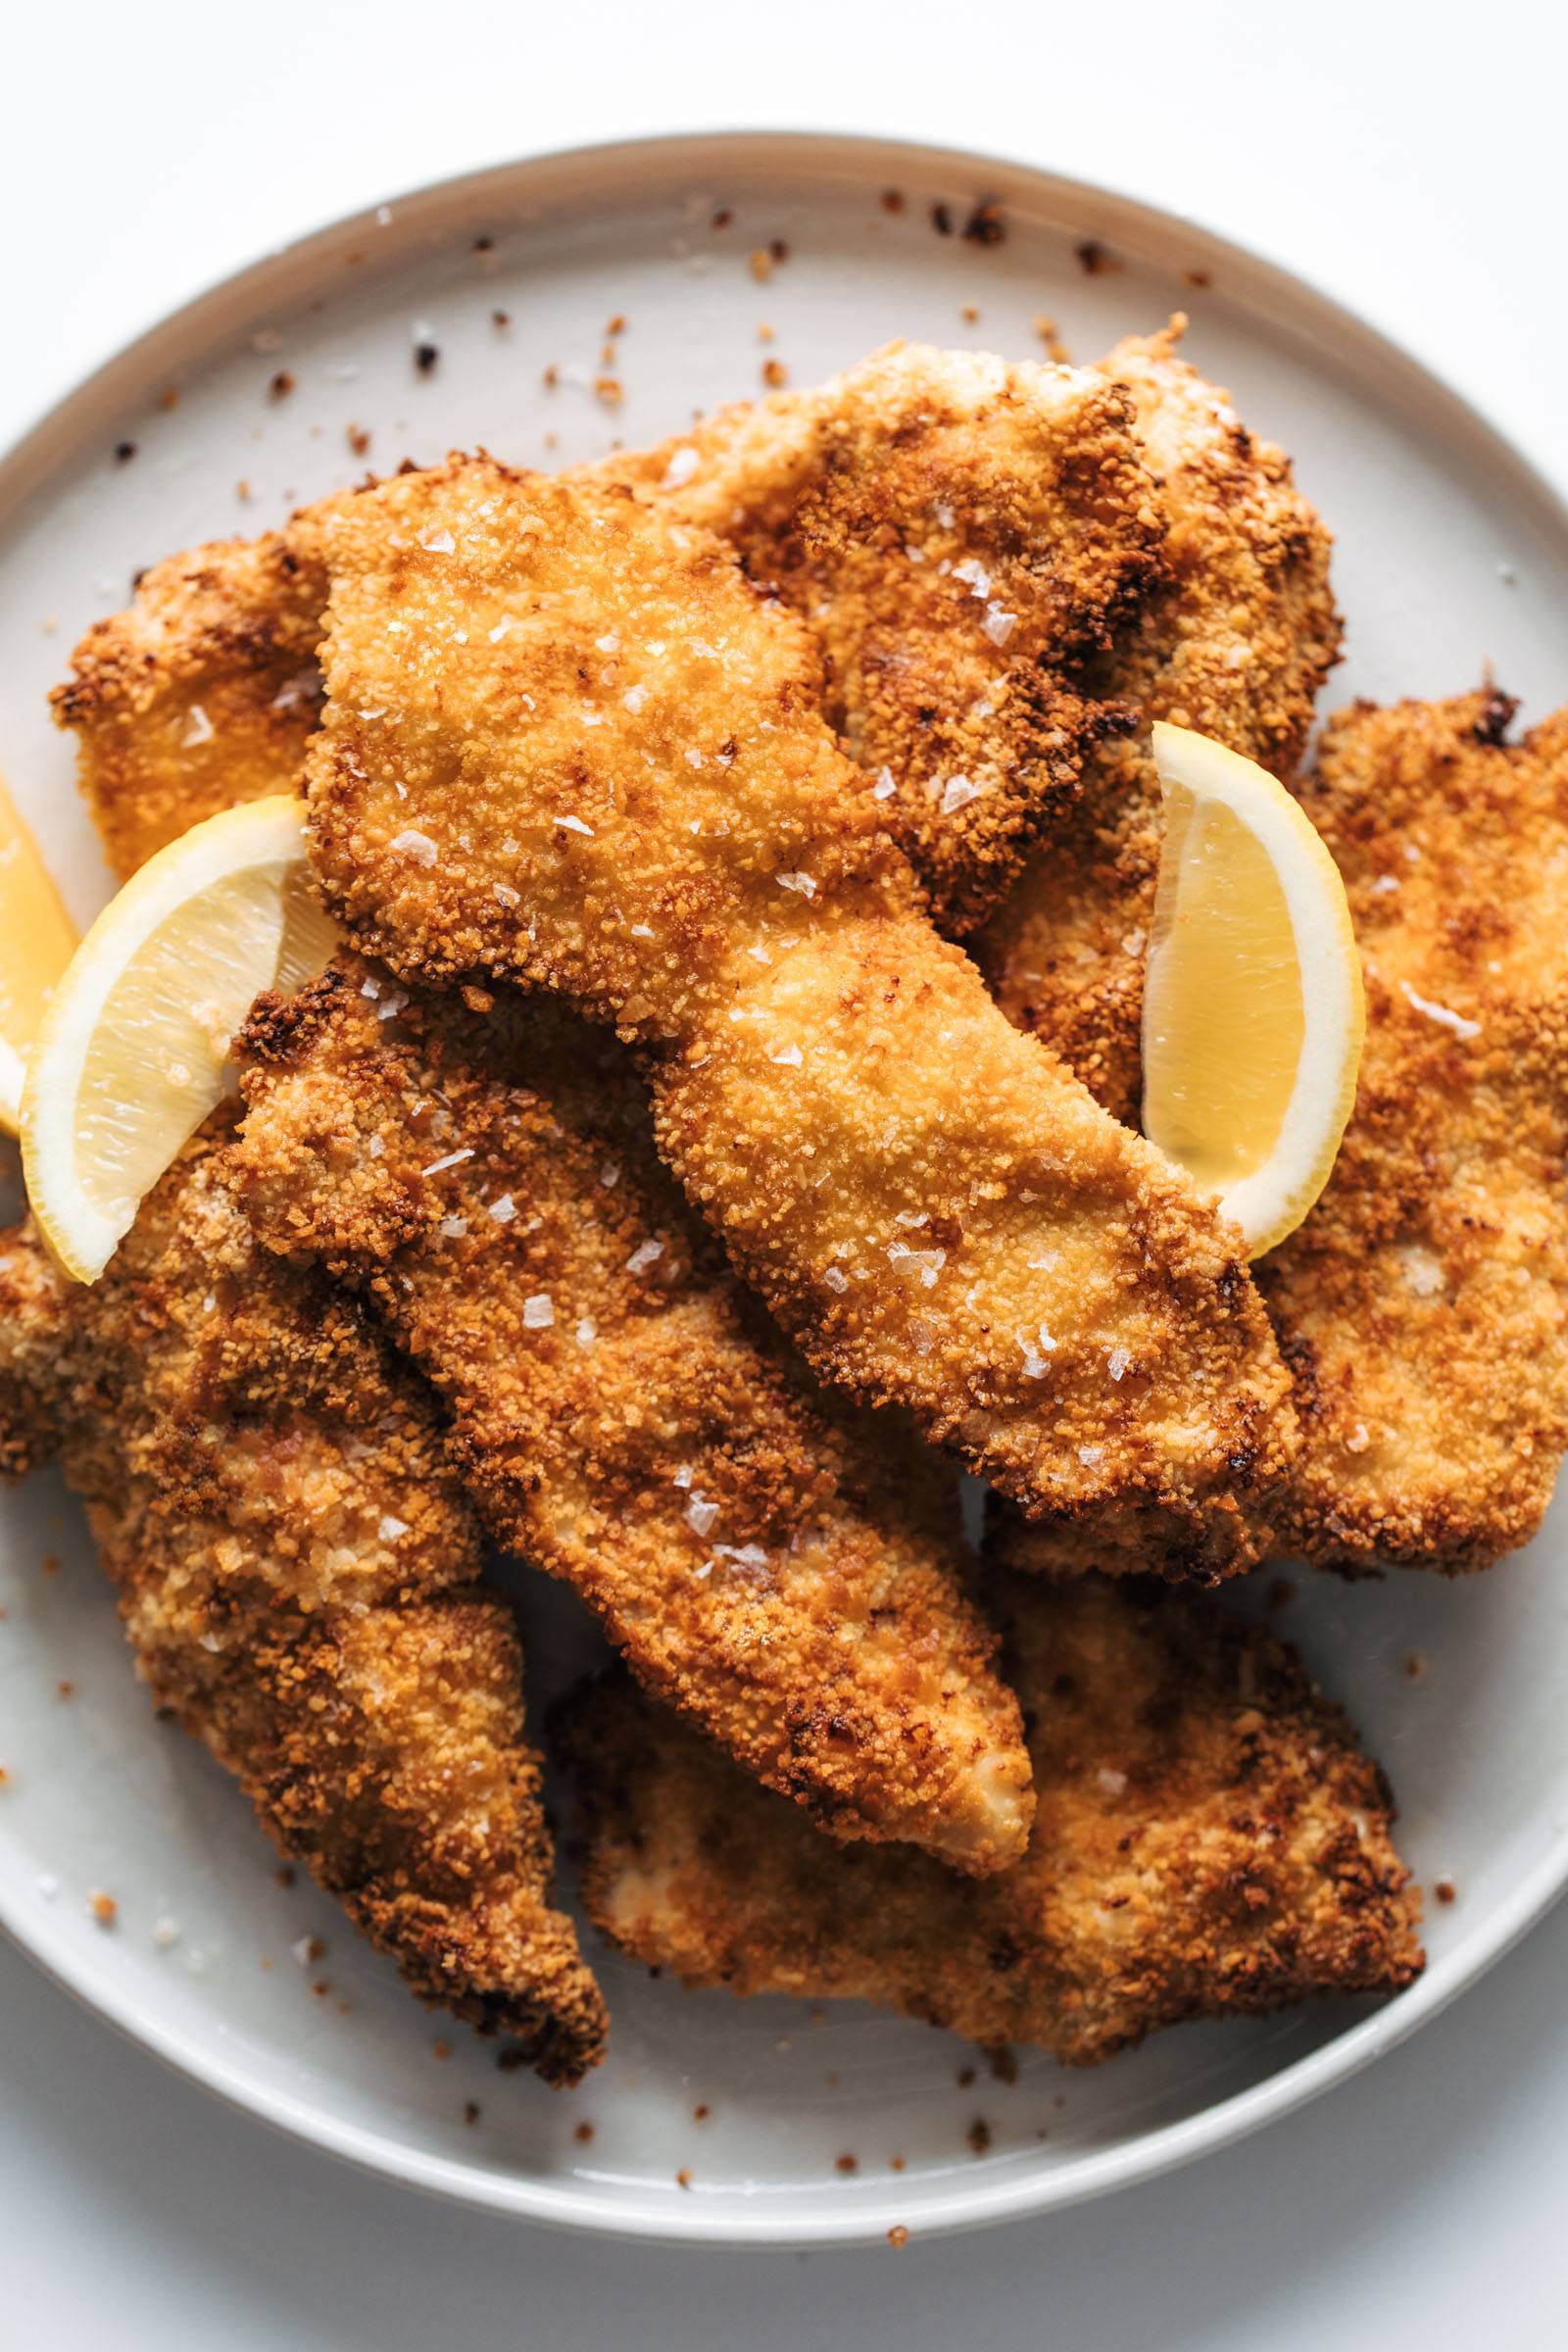


There Is No Grilled Cheese Crispier Than This Midwestern Classic
Ooey-gooey and oh-so-crunchy, this fried cheese sandwich is a Nebraskan icon.


Grilled cheese sandwiches are peak nostalgia for me. As a kid, I ate so many of them—usually tucked beside a bowl of Campbell’s tomato soup—that American cheese practically earned a tier on my personal food pyramid. As an adult, I have experimented with different breads, cheeses, and accouterments, and I thought I had experienced just about everything the humble cheese sandwich had to offer. That is, until I heard about the cheese Frenchee.
The cheese Frenchee is the deep-fried alter ego to the classic grilled cheeses of my youth, battered and coated with cornflakes or cracker crumbs for extra crunch. It’s been a Nebraska favorite for more than 70 years, but it’s all but unheard of outside of the state (I grew up in neighboring Kansas and only learned of this delightful creation a few months ago).
Where Did the Cheese Frenchee Come From?
While it might feel like a state fair invention, it’s actually the golden, crispy legacy of a restaurant called King’s Food Host. The bygone King’s Food Host chain (initially named King’s Drive-In) was founded in the 1950s by Larry Price and James King in Lincoln, Nebraska. Although the rest of the menu was standard drive-in fare—hamburgers, chili dogs, sundaes, and the like—the cheese Frenchee and its tuna melt variation (aptly named the tuna Frenchee) was an early staple of the restaurant. It’s widely speculated that the “Frenchee” moniker came from the sandwich’s similarity to the French croque monsieur. (Personally, I find the comparison a tad tenuous since croque monsieurs include ham and aren’t battered or fried, but I couldn’t find any competing theories.)
Other than the fried sandwiches, a few things set King’s Food Host apart from other diners. According to an article in the Park Rapids Enterprise, out of principle, Price refused to allow cigarette vending machines (common at the time) in the restaurant because it promoted smoking for young people. And to prevent waitstaff from competing or appearing “greedy,” employees were paid equal wages, and tipping was discouraged.
Another memorable aspect of King’s locations was the fact that there was a phone in each booth, which patrons used to call in their orders from their seats. All these novelties contributed to King’s Food Host's success; over its two-decade-long heyday, the company and its franchises grew to more than 130 locations across the United States (mainly in Midwest college towns) and one in Canada, according to the website Restaurant-ing Through History. Despite—or perhaps because of—the explosive expansion, King’s Food Host declared bankruptcy in 1974 after being sold to investors and shuttered its storefronts soon after. 
Though King’s Food Host no longer exists, cheese Frenchee nostalgics can still find satisfaction—that is, if they live in Nebraska. The original recipe was reportedly acquired by a founder of Don & Millie’s, a fast food joint with eight locations throughout the state. Amigos/Kings Classic, a combination Mexican-American and burger chain, is another popular Frenchee destination throughout Nebraska. For the rest of us, we must (and yes, I mean must) fry our cheese sandwiches ourselves.
4 Tips for Making Cheese Frenchees at Home
1. Choose the right bread. While researching this recipe, I found a few sources that insisted on using thick-cut, Texas Toast–style bread for making cheese Frenchees. As a bread-loving Midwesterner, this made sense to me; if you’re already deep frying a cheese sandwich, you might as well use inch-thick slabs of bread to make said sandwich. While the resulting Frenchees were, in fact, gloriously hulking, their thickness made them challenging to bite into. I also found them too bready, even when I added extra cheese. For a more balanced ratio, I prefer a standard soft white sandwich bread (around a half inch to three-quarters inches thick per slice).
Since cheese Frenchees are typically fried in half- or quarter-sandwich triangles for maximum crunch in each bite, it’s best to use tall, square white bread vs. broad, rectangular slices to get the best wedge shape. Think Wonder Bread or Sara Lee sandwich bread, not artisan-style slices (a square pullman loaf would work fantastically here, too). Trimming the crusts from the sandwich creates straight edges that are easier to coat with a uniform layer of batter and crumbs. In turn, a more thorough coating will help seal the cheese inside and prevent it from oozing out while frying.
2. Use a flour batter and cornflakes to coat the sandwiches. Most recipes I found agreed on a flour-based mixture to batter the Frenchees, but a few used an egg-and-milk wash to moisten the wedges before dipping them in crumbs. I tested both and found an obvious winner: a pancake-like batter was not only easier to work with (the egg wash made the bread soggy and hard to manage), but it also made the sandwiches crunchier after frying. The choice between cornflakes and cracker crumbs was equally clear: Though they were about the same in terms of texture, coarsely crushed cornflakes added a delightful sweetness that played well with the tang of the mayonnaise and the creamy melted cheese.
3. Chill the Frenchees before frying. After coating the sandwiches, it’s best to refrigerate them for at least 20 minutes or up to one day. The chill time allows the moisture from the batter to permeate the bread and cornflake layers, gluing them all together. The wedges become firmer after resting (making them easier to handle in and out of the oil). The coating also clings more to the sandwich, forming a cohesive layer that’s less likely to leak cheese or slough off during frying.
4. Fry the sandwich wedges quickly. Cornflakes contain sugar and can burn if fried too long or at too high a heat. Luckily, American cheese is the undisputed champion melter and has been the go-to pick for the cheese Frenchee since its inception. Since American cheese has more moisture (and emulsifiers like sodium phosphate), it has a lower melting point than other cheeses. For example, cheese Frenchees achieve a gooey interior in just two minutes, while Italian fried mozzarella sandwiches need to fry for double the time to get full mozzarella melt. Be sure to let the sandwiches cool before digging in; their sturdy crusts keep them piping hot inside for 10 minutes or more after cooking.
Once you've got the technique for the Frenchee in its most classic form down, you can use it as a jumping point for your own Frenchee creation. Try another spread in place of mayonnaise (Miracle Whip is a common substitute) or leave it out entirely. Add a spoonful of a melt-style tuna salad between the cheese slices to experience the King’s Food Host’s tuna Frenchee, or add some thinly sliced deli ham. Other cheeses can be used instead of American, but the inside of the sandwich won’t be quite as melty; a good solution is to use a slice of American alongside another cheese, such as sharp cheddar, for superb texture and flavor (I highly recommend this). Cheese Frenchees are often served with a few dill pickle chips and ketchup, but feel free to serve them with any dipper you like—or as is.
Place cornflakes in a zip-top bag and use a rolling pin to lightly crush into coarse crumbs (about the consistency of panko). Pour into a shallow bowl or pie plate. In a second shallow bowl or pie plate, combine flour, egg, milk, and salt, and whisk until smooth. Set both bowls aside.
Spread 1/2 tablespoon mayonnaise on one side of each slice of bread. Set 2 bread slices down, mayonnaise side up, on a work surface. Center two cheese slices on the mayonnaise side of the 2 bread slices, then top each with the remaining bread slices, mayonnaise side down.
Use a serrated bread knife to trim crust from all sides of each sandwich to create straight sides. Cut sandwiches in half diagonally to form triangular wedges.
Working with one wedge at a time, dip all sides into flour batter to evenly cover. Let excess batter drip off, then press all sides into cornflake crumbs to thoroughly coat. Use hand to press in additional cornflake crumbs to ensure even coverage. Transfer to a plate and repeat with remaining wedges. Refrigerate wedges while oil heats, at least 20 minutes or up to 1 day. Sandwiches will firm up slightly as they rest.
While sandwiches chill, line a large plate with paper towels or place a wire rack inside a baking sheet; set aside. In a large Dutch oven or 10-inch cast iron skillet, add oil until it measures 1 inch deep and heat over medium heat to 350ºF (177ºC). 
Using tongs or spider skimmer, carefully transfer two sandwich wedges into oil. Fry, adjusting heat as needed to keep oil temperature between 330 and 350°F (165ºC to 177ºC), until bottom is deep golden brown, about 1 minute. Flip and continue cooking until deep golden brown on second side, about 1 more minute. Transfer to prepared plate or baking sheet and repeat with remaining wedges. Let cool for 10 minutes before serving.
Special Equipment
Rolling pin, serrated bread knife, tongs or spider skimmer, 10-inch cast iron skillet or Dutch oven, instant-read or leave-in probe thermometer
Notes
For the classic triangular wedge, use sandwich bread that is tall and square vs. broad and rectangular, such as Wonder Bread or Sara Lee sandwich bread. A soft, pullman-style loaf cut into 1/2- to 3/4-inch slices would also work well here.
Make-Ahead and Storage
Once battered and coated, the sandwiches can be chilled in the refrigerator for up to a day before frying. You can also set the uncooked, coated sandwich wedges on a parchment-lined baking sheet and freeze until ready to cook. Once frozen, cheese Frenchees can be placed in a zip-top bag and frozen for up to 3 months. When cooking from frozen, reduce oil heat to 325°F and increase cooking time by 1 to 2 minutes per side, or until internal temperature reaches 160°F.

