How to get out of Auto mode: A beginner’s guide
Have you ever wondered why your photos feel flat, lifeless, or just not quite what you imagined? It can be a matter of focus, exposure, or one of many other things that can go wrong while shooting in auto mode. Auto mode is meant for convenience and not creativity. Sure, it can help to capture a moment in a pinch, but it can fall short when it comes to reflecting your vision. It decides for you according to the surrounding. While it can be mostly correct, it can also lack emotions and depth. This is where Manual mode can come in handy. Getting acquainted with Manual mode doesn’t have to be as complicated as it is said to be. We can learn how to take control of the camera settings using the manual mode one step at a time. By the end of this article, you will be able to use the manual settings to bring your imagination to life with the feel you want. Why ditch Auto mode? When you start with photography, auto mode is quite helpful. However, Auto mode can eventually take control of the most important creative tools, such as shutter speed, aperture, ISO, and white balance, over time. These settings determine how your image appears and how it is perceived by your viewers. They control how sharp the subject is, how bright or moody the light appears, and how much the scene is in focus. Also, Auto mode can be tricky while working in a fast-moving scene or tricky lighting. By using manual mode, you can choose the appropriate settings for your pictures. It gives you full creative control over how sharp, moody, or vibrant you want your images to be. For example, if there is a street performer in Golden Hour you want to photograph, Auto mode can sometimes expose the whole scene and wash out the atmosphere. But in manual mode, you can control the exposure in favor of the performer and capture the mood you feel the best. Understanding the Exposure Triangle The Exposure Triangle is the best way to fix your images if you feel that they are too dark or too bright. It consists of shutter speed, aperture, and ISO. All these settings can ultimately control how much and how the light enters your camera. Together, these settings can control how bright your images are. For instance, you can imagine a room with windows, curtains, and a light-sensitive floor. Shutter speed is how long you open the curtains; aperture is how wide you open it; and ISO is how sensitive the film or camera sensor is to light coming in. In this case, if you only open the curtain a crack (i.e., narrow aperture), then you will need to open it longer (i.e., slow shutter speed), or make the floor more light-sensitive (i.e. a high ISO). How to switch to Manual mode Initially, switching to Manual mode can be a bit difficult, but it can be easier if you break it down step by step. Before starting with the manual mode, you can start with the Aperture priority (A/Av) or the shutter priority (S/Tv). These controls, or the semi-manual modes, let you control one element at a time, while the cameras can handle the rest. When you are ready, you can find the M mode on your camera’s mode dial. You can start by using the ISO at 100 in the bright light, or you can use Auto ISO if unsure. For shutter speed, you can start with 1/125 for general uses or portraits. Then, start with an aperture of f/5.6 for a balance between the sharpness and the blur in the background. You can start with a few test shots then adjust a single setting at a time and start to test. Using light meter and histogram like a pro The light meter and histogram are the tools that your cameras have to help you know when the image is too dark or too bright. The light meter is basically a scale with numbers like -2, -1, 0, +1, +2. When it is at 0, the exposure is balanced. If the numbers are on the left or negative, it means that the image is underexposed (too dark). If they are on the right or positive, it means it’s overexposed (too bright). You can fix the exposure by adjusting the shutter speed, aperture, and ISO. Lower your shutter speed, open the aperture, and increase your ISO. Meanwhile, the histogram is a graph of how the light is distributed across the image. The left side of the histogram shows the shadows, the right side shows the highlights, and the middle shows the midtones. A balanced exposure is somewhere near the center. If the histogram is stacked to the left image is too dark, and if stacked to the right, it is too bright. One of the best practices is to protect the highlights, as once they are overexposed, they become too white and you can’t get the details back. Practice scenarios to build confidence Nervousness is natural in the beginning, but you can start by practicing more and more, and you will certainly improve and gain confidence in your work. You can try one scenario at a time and see what setting affects the images and how. Some scenes that you can practice with are beginner-friendly situations. Troubleshooting common beginner mistakes Learning manual mode can be a


Have you ever wondered why your photos feel flat, lifeless, or just not quite what you imagined? It can be a matter of focus, exposure, or one of many other things that can go wrong while shooting in auto mode. Auto mode is meant for convenience and not creativity. Sure, it can help to capture a moment in a pinch, but it can fall short when it comes to reflecting your vision. It decides for you according to the surrounding. While it can be mostly correct, it can also lack emotions and depth. This is where Manual mode can come in handy.
Getting acquainted with Manual mode doesn’t have to be as complicated as it is said to be. We can learn how to take control of the camera settings using the manual mode one step at a time. By the end of this article, you will be able to use the manual settings to bring your imagination to life with the feel you want.
Why ditch Auto mode?
When you start with photography, auto mode is quite helpful.
However, Auto mode can eventually take control of the most important creative tools, such as shutter speed, aperture, ISO, and white balance, over time. These settings determine how your image appears and how it is perceived by your viewers. They control how sharp the subject is, how bright or moody the light appears, and how much the scene is in focus.
Also, Auto mode can be tricky while working in a fast-moving scene or tricky lighting. By using manual mode, you can choose the appropriate settings for your pictures. It gives you full creative control over how sharp, moody, or vibrant you want your images to be.
For example, if there is a street performer in Golden Hour you want to photograph, Auto mode can sometimes expose the whole scene and wash out the atmosphere. But in manual mode, you can control the exposure in favor of the performer and capture the mood you feel the best.
Understanding the Exposure Triangle

The Exposure Triangle is the best way to fix your images if you feel that they are too dark or too bright. It consists of shutter speed, aperture, and ISO. All these settings can ultimately control how much and how the light enters your camera.
- Shutter speed basically controls how fast your camera takes a picture. A fast shutter speed can freeze motion is perfect for action shots, and a slower shutter speed can let in more light and create a blur, or slow down motion in the picture.
- Aperture can control how wide the lenses open. A low f-stop or aperture means a wide opening and hence a blurry background, which is great for portraits. A high f-stop or aperture keeps the scene more in focus and hence is great for landscapes.
- ISO is your camera’s light sensitivity. A low ISO keeps the images clean and crisp, whereas a high ISO can make your camera more sensitive and hence images more grainy.
Together, these settings can control how bright your images are.
For instance, you can imagine a room with windows, curtains, and a light-sensitive floor. Shutter speed is how long you open the curtains; aperture is how wide you open it; and ISO is how sensitive the film or camera sensor is to light coming in. In this case, if you only open the curtain a crack (i.e., narrow aperture), then you will need to open it longer (i.e., slow shutter speed), or make the floor more light-sensitive (i.e. a high ISO).
How to switch to Manual mode
Initially, switching to Manual mode can be a bit difficult, but it can be easier if you break it down step by step.
Before starting with the manual mode, you can start with the Aperture priority (A/Av) or the shutter priority (S/Tv). These controls, or the semi-manual modes, let you control one element at a time, while the cameras can handle the rest.
When you are ready, you can find the M mode on your camera’s mode dial. You can start by using the ISO at 100 in the bright light, or you can use Auto ISO if unsure. For shutter speed, you can start with 1/125 for general uses or portraits. Then, start with an aperture of f/5.6 for a balance between the sharpness and the blur in the background.
You can start with a few test shots then adjust a single setting at a time and start to test.
Using light meter and histogram like a pro
The light meter and histogram are the tools that your cameras have to help you know when the image is too dark or too bright.
The light meter is basically a scale with numbers like -2, -1, 0, +1, +2. When it is at 0, the exposure is balanced.
If the numbers are on the left or negative, it means that the image is underexposed (too dark). If they are on the right or positive, it means it’s overexposed (too bright).
You can fix the exposure by adjusting the shutter speed, aperture, and ISO. Lower your shutter speed, open the aperture, and increase your ISO.
Meanwhile, the histogram is a graph of how the light is distributed across the image. The left side of the histogram shows the shadows, the right side shows the highlights, and the middle shows the midtones. A balanced exposure is somewhere near the center. If the histogram is stacked to the left image is too dark, and if stacked to the right, it is too bright.
One of the best practices is to protect the highlights, as once they are overexposed, they become too white and you can’t get the details back.
Practice scenarios to build confidence
Nervousness is natural in the beginning, but you can start by practicing more and more, and you will certainly improve and gain confidence in your work. You can try one scenario at a time and see what setting affects the images and how. Some scenes that you can practice with are beginner-friendly situations.
- Start with portraits with a soft or blurred background. In this situation, you can see how adjusting the aperture affects the image. To make the subject stand out, you can set your aperture at f/2.8 – f/4, which creates a shallow depth of field.
- The next scenario is to capture movements. Using this scenario, you can practice adjusting the shutter speed. You can use a fast shutter speed in order to freeze motion and to get some sort of panning shots. You can practice by using everyday scenarios, such as playful pets or kids running around a park.
- In the dim light of the evening, you can click great pictures by increasing or raising the ISO, opening the aperture wide open, and slowing down the shutter speed. These combinations in the evening and other dim light conditions can keep your images bright without a flash.
- For shooting in daylight scenes with a backlight or a bright background, you can use manual exposure for the best result. A high ISO and the wide aperture help in such situations.
- For indoor, everyday scenarios, you can practice for the ISO and white balance.
Troubleshooting common beginner mistakes
Learning manual mode can be a process of trial and error. Some of the common mistakes that beginners make can be avoided.
- To avoid the situation where the image is underexposed (too dark) or overexposed (too bright) means that one of the exposure settings is off balance.
- Another one is the blurry images, which are due to the slow shutter speed, it can be avoided by using a faster shutter speed.
- If there is grain or noise in your images, then the issue is that your ISO is too high, especially in low-light conditions.
To resolve such issues, you can even use some noise reduction software, but this can be avoided if you lower the ISO or add more light to the scene.
Wide apertures and slower shutter speeds can prevent the ISO getting too high. To make the background sharp, use narrow aperture for greater depth of field.
You can try to use Auto if you are in fast-moving situations and do not want to miss the moment. Use semi-auto modes (Aperture Priority or Shutter Priority) if you only want control over a single setting and let the camera handle the rest. Take note of how the settings affect your images in semi-auto modes.
Best tools to practice shooting in Manual mode
Practice is still the best way to learn how to shoot in Manual mode. It pays to dedicate some time to get acquainted with your camera and explore different settings for both indoor and outdoor settings.
Or, you can also can try using online stimulators such as the CameraSin or Photography Life’s Simulator.

With these simulators, you can practice adjusting the shutter speed, aperture, and ISO and see how this affects the image in real time. You can also use apps like Manual Camera (iOS) or ProShot (Android/iOS) to simulate the DSLR-type controls on your phone camera. These apps can give you real camera practice with DSLR settings and help you gain remote control settings.
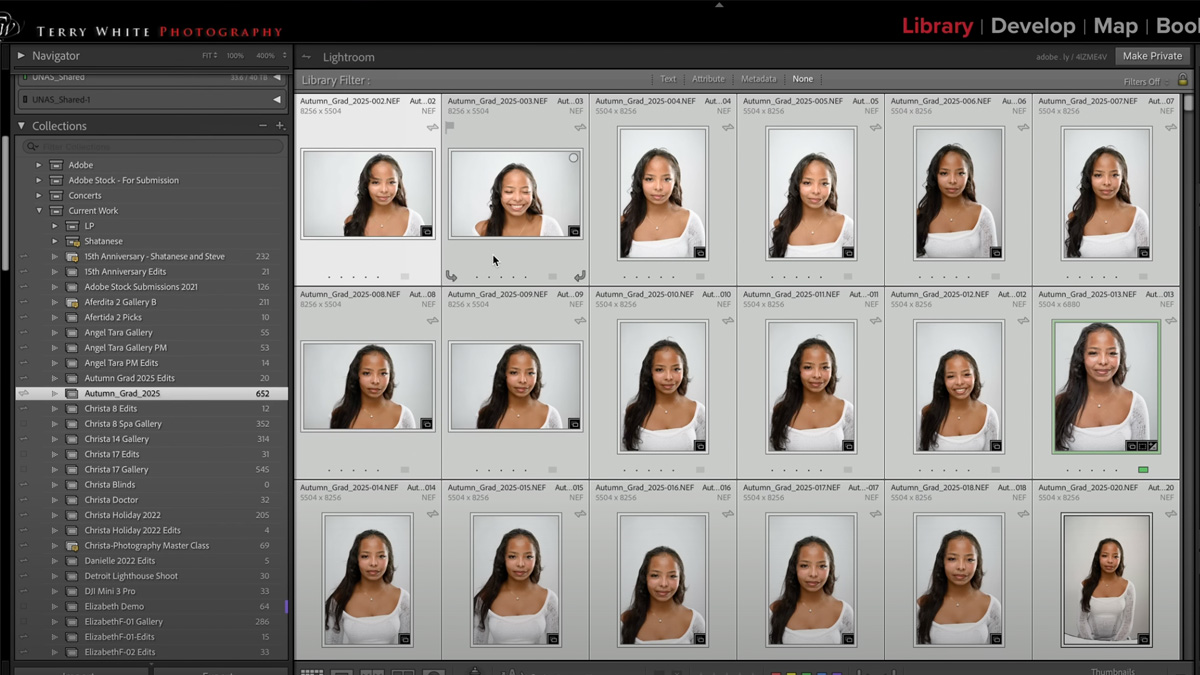
You can also use the available histograms in software like Lightroom or Photoshop to see how the exposure turned out.
Carrying a cheat sheet or a printable guide with you can also help as a quick backup, at least in the learning phase.
Conclusion
Manual mode can give you control over the image and how you want it to turn out and feel. Hopefully, this article can help you start and improve with manual mode. After learning the basics, you can move further and ask any questions in the comments.
Editor’s Note: We welcome this guest post from Manthan Gajjar.
Manthan Gajjar is a professional photographer and founder of photographywith.com, which hosts all his writing on photography, gear reviews, editing, and much more.
























![nqz "I would be lying if I said I don't [feel pressure]. It was so different for me to see all those people and be in a Major playoffs"](https://img-cdn.hltv.org/gallerypicture/kAkShxXB96gCZmlpU-ivfH.jpg?auto=compress&ixlib=java-2.1.0&m=/m.png&mw=107&mx=20&my=474&q=75&w=800&s=935037b04cd96d3e70935ccfb24c348e#)


