


.jpg)


.jpg)


How to download and upload screenshots on Nintendo Switch 2
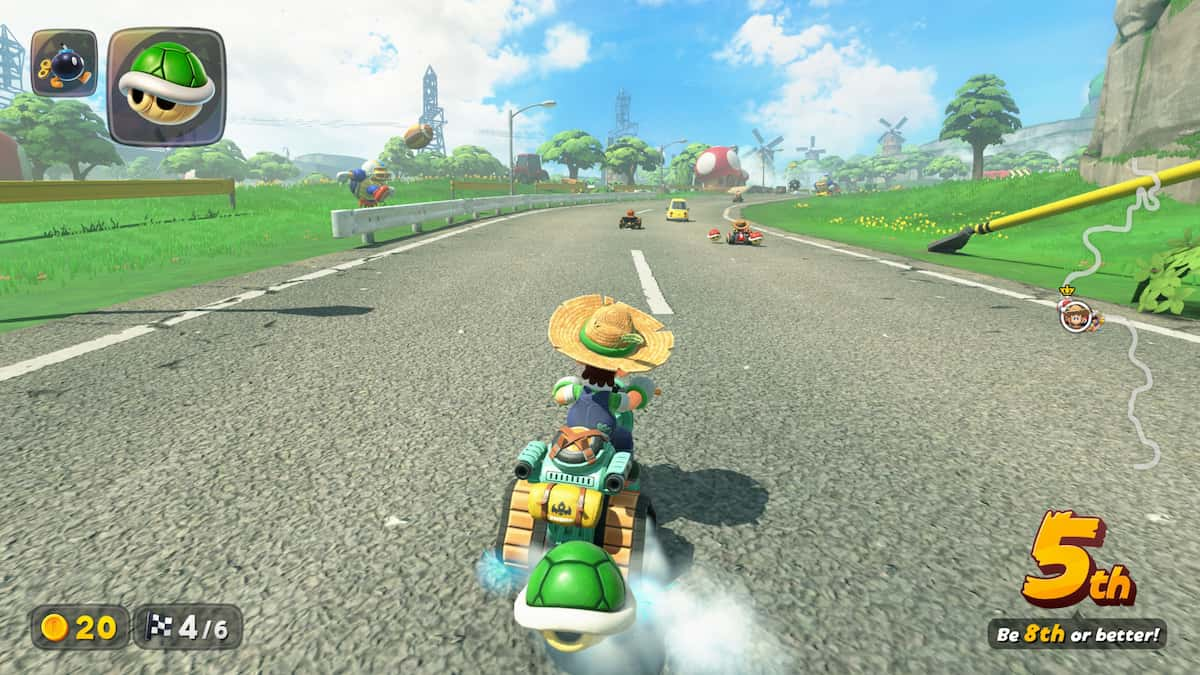
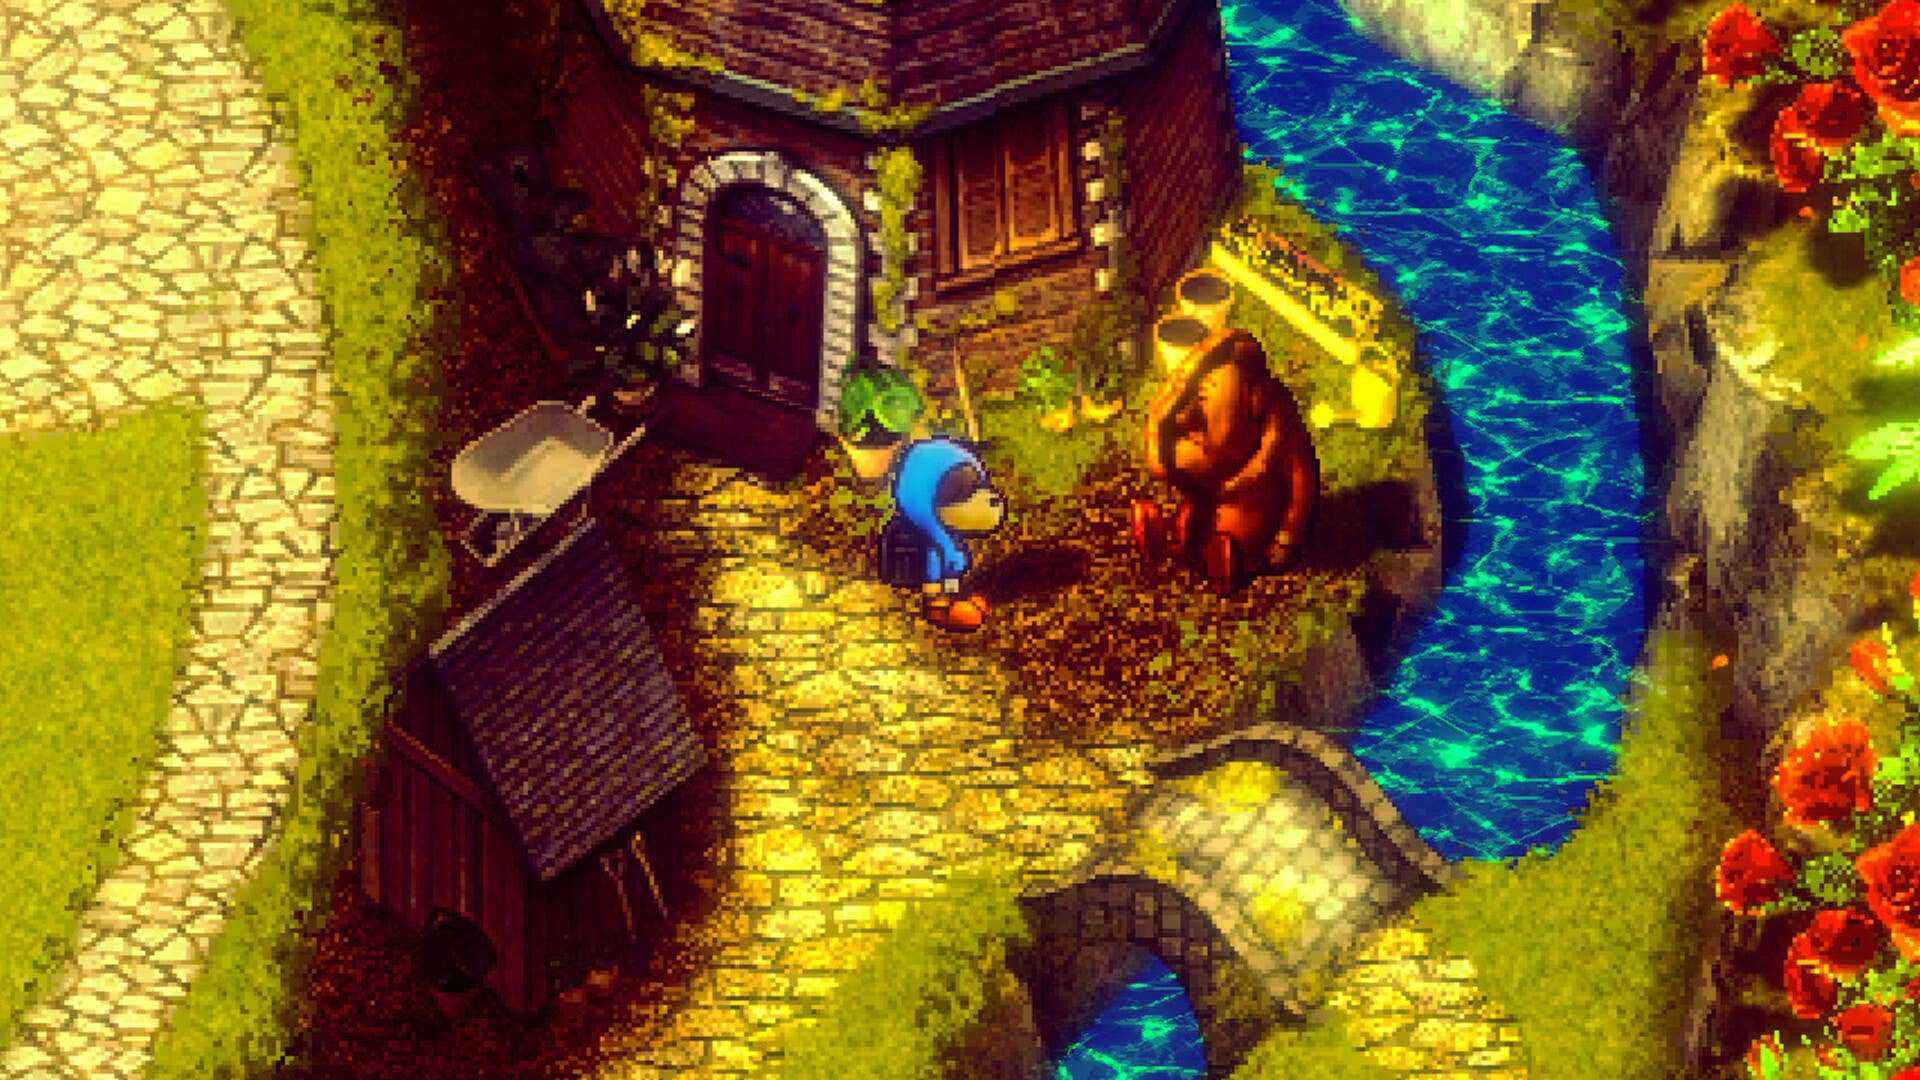
What good is a big W in gaming if you can't share it online and boast about it to friends and enemies alike? Thankfully, the Nintendo Switch 2, like its predecessor, has a button for screenshotting anything that happens in your games. But to share the screenshots, you need to take some steps to get them onto a smart device so that you can then post them online. Here's everything you need to know about how to take screenshots on the Nintendo Switch 2, upload them, and download them on to your devices so you can share them with friends. How to download and upload screenshots on Nintendo Switch 2 Photo by Scott Duwe To view and download your Nintendo Switch 2 screenshots, you need the Nintendo Switch mobile app for Android or iOS. Screenshots you take on your Switch 2 must be uploaded to the app so you can then download them from the app onto your smart phone and use them how you like. To find the app, search "Nintendo Switch" on the Google Play Store or Apple App Store, download it onto your smart device, and log in with the same Nintendo Online account that you're using on your Switch 2. Photo by Scott Duwe To take a screenshot on Switch 2, use the screenshot button (the square button with a circle inside on the left JoyCon or left side of the Pro Controller). To upload it, access the Album button from the Home menu, or press the Home button shortly after screenshotting. From your Album, select the screenshot you want and press A to open up its Menu. Then, select Upload to Smart Device to find it on your Nintendo Switch app on your phone. Screenshot by Destructoid | Remix by Scott Duwe In the mobile app, select the bottom right Album icon (it's the same as it is on the Switch 2) to see all of your uploaded screenshots. You can select each screenshot individually to download them onto your device, or press Share to open up your device's sharing options. The post How to download and upload screenshots on Nintendo Switch 2 appeared first on Destructoid.

What good is a big W in gaming if you can't share it online and boast about it to friends and enemies alike?
Thankfully, the Nintendo Switch 2, like its predecessor, has a button for screenshotting anything that happens in your games. But to share the screenshots, you need to take some steps to get them onto a smart device so that you can then post them online.
Here's everything you need to know about how to take screenshots on the Nintendo Switch 2, upload them, and download them on to your devices so you can share them with friends.
How to download and upload screenshots on Nintendo Switch 2

To view and download your Nintendo Switch 2 screenshots, you need the Nintendo Switch mobile app for Android or iOS. Screenshots you take on your Switch 2 must be uploaded to the app so you can then download them from the app onto your smart phone and use them how you like.
To find the app, search "Nintendo Switch" on the Google Play Store or Apple App Store, download it onto your smart device, and log in with the same Nintendo Online account that you're using on your Switch 2.
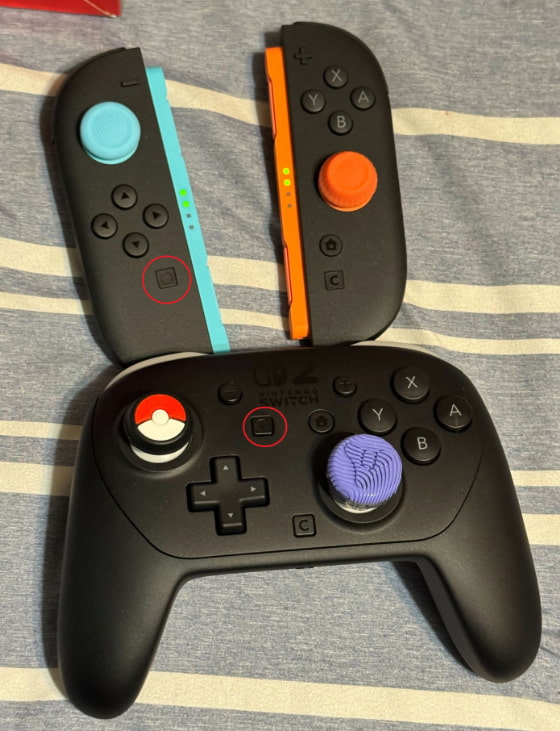
To take a screenshot on Switch 2, use the screenshot button (the square button with a circle inside on the left JoyCon or left side of the Pro Controller). To upload it, access the Album button from the Home menu, or press the Home button shortly after screenshotting.
From your Album, select the screenshot you want and press A to open up its Menu. Then, select Upload to Smart Device to find it on your Nintendo Switch app on your phone.

In the mobile app, select the bottom right Album icon (it's the same as it is on the Switch 2) to see all of your uploaded screenshots. You can select each screenshot individually to download them onto your device, or press Share to open up your device's sharing options.
The post How to download and upload screenshots on Nintendo Switch 2 appeared first on Destructoid.